Tuesday, June 18 4:10:26 PM PST
by Ryan Kairer
Palm announced today that an unlocked Palm phones can now be purchased through
Palm.com. The Palm device can now be used on its own and no longer requires a paired smartphone or Verizon wireless plan.
The device is being offered as a $350 unlocked model. Customers who preorder the Palm now for $350 USD will receive an unlocked device and a Palm Leather Case with neck and wrist lanyards and free shipping when orders go out in the next six weeks.
Palm unlocked can be used with most major carriers in the US including AT&T, Verizon, T-Mobile, Cricket Wireless and MetroPCS. Palm says the the device is not currently compatible with the Sprint network though it can also be used as a WiFi only device.
Thursday, October 25 2:14:26 PM PST
by Ryan Kairer
Verizon today
announced that the new Palm will be
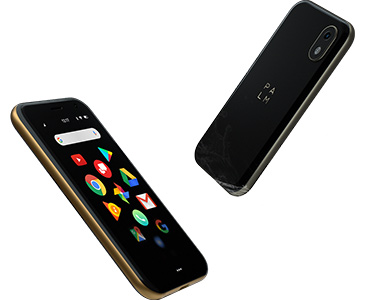
available exclusively on the Verizon network starting November 2nd. The new Palm, yes they are simply calling the new device Palm, will come in two color models - Titanium and Gold for the full retail price of $349.99 or $14.58 per month for 24 months on device payment (0% APR). Additionally users will be required to utilize Verizon NumberShare at $10 per month per line.
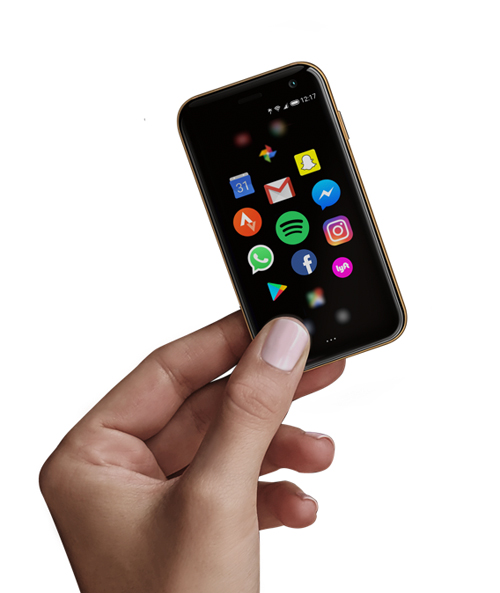
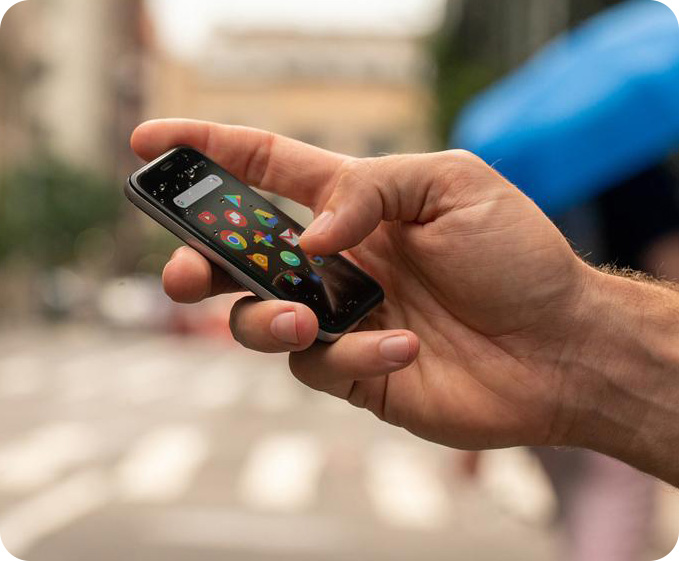
The new Palm is being billed as a companion to your smartphone. The credit card sized device is meant to keep you connected while also allowing you to "live in the moment." It syncs with your existing smartphone via NumberShare and runs Android and Google Play applications such as Apple Music.
Monday, October 15 10:48:17 AM PST
by Ryan Kairer
The company behind the Palm brand revival is out with the news about its new Palm phone device. The new product is basically a "mini phone" backup companion to your standard modern large screen smartphone. The device will debit later in November in the USA exclusively on the Verizon network for around $349 or an extra $25 a month on your phone bill.
The device is about the size of a credit card and features a 3.3" 720p display, dual cameras and a 800 mAh battery. It weights a super slim 2.2 ounces and will come in black with titanium or gold metal surrounds. Its running a version of Android 8.1 powered by a Qualcomm Snapdragon 435 with an X9 LTE modem with 3GB of RAM and 32GB of storage.
There doesn't seem to be an official name for the device of yet as its simply being referred to as "Palm" in press reviews and on the new Palm.com. The San Francisco based startup company running this latest incarnation of the Palm apparently licensed the Palm brand name from TCL. Other than the brand name, there is very little to no connection to the Palm Inc. that produced PDAs and the Tree smartphones.
Saturday, September 8 7:39:15 PM PST
by Ryan Kairer
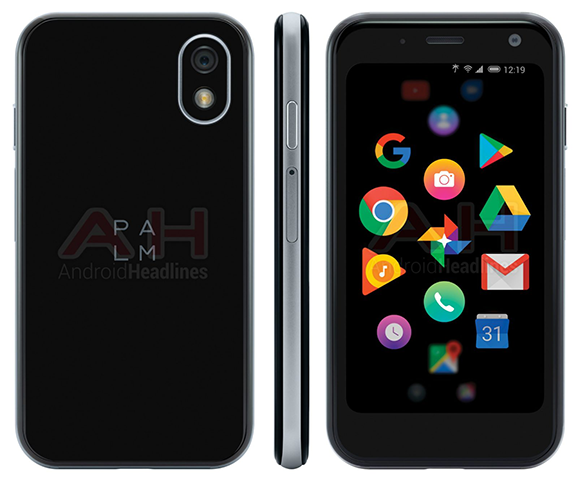
The rumored Palm smartphone comeback seems to be progressing with a new leak. A new photo sourced by
AndroidHeadlines shows off a design render of the Palm Pepito aka Palm PVG100. Of note is the small profile and expected 3.3" inch screen that puts this smartphone squarely in the micro size department.
The Pepito was last spotted in early August and the latest pic appears to lend credence to some of the earlier rumors with its similarity. The photo also shows some interesting details such as the new Palm logo and a custom Android app launcher. Also of note is a small palm tree icon in the status bar of which its purpose is unclear. The Palm Pepito device is said to sport a 3.3 inch, 720p resolution screen. Android 8.1 is the expected operating system paired with a Qualcomm Snapdragon 435 processor, 3GB of RAM and 32GB of internal storage.
Aside from the new picture no other new details have come to light at this time. Previous sources have claimed that Verizon is anticipated to be the first carrier to offer the device in the United States although an official launch timeframe is still unknown.
Thursday, August 9 10:25:59 PM PST
by Ryan Kairer

Android Police once again
has additional details on the latest Palm rebrand leaks. This time around the site has published a new set of photos that purport to show the Palm PVG100 phone. Going by the code name Palm Pepito, they also have some new details on the smartphones specs.
The pictures show a very small form factor device with a micro display by today's standards. It is said to sport a 3.3 inch, 720p resolution screen. Android 8.1 is the expected operating system and it will be powered by a Qualcomm Snapdragon 435 chip paired with 3GB of RAM and 32GB of internal storage.
Tuesday, August 7 6:50:43 PM PST
by Ryan Kairer
The recent
Palm PVG100 reveal has thrust a few new details about the Palm brand relaunch out into the wild. One of the more curious points to arise is the name of company that is making the actual fillings called Palm Ventures Group.
As of publication, Palm Ventures Group has zero web presence and very few mentions on the web other than in the recent FCC and WiFi Alliance regulatory fillings. The new fillings go on to reveal the company cofounders and well as a potential new Palm brand logo.
Tuesday, August 7 5:15:25 PM PST
by Ryan Kairer

Newly published FCC documents have revealed a possible new Palm branded device headed our way soon. Our earlier story today showed that new documents reveal that a new
Palm PVG100 model has been submitted for testing to the FCC. While the actual device photos are still under wraps, one potential piece of the final product has been included in the release.
The documents show a proposed label for the device which lists the usual FCC ID, Serial and IMEI numbers and barcodes. The label also includes what may be the first hint at what the new logo that could be used for the Palm brand relaunch. The full image suggests the logo may be placed on the back of the device or possibly within a battery compartment.
Full picture after the break...
Update: New leaks appear to confirm this is indeed the new logo for the Palm brand relaunch.
Tuesday, August 7 4:20:38 PM PST
by Ryan Kairer
A new Palm branded mobile device has been spotted in newly posted public FCC fillings. First spotted by the site,
Android Police, the documents make numerous references to a Palm PVG100 model submitted by a company called the Palm Ventures Group, Inc.
The Palm PVG100 could very likely be the first new Palm branded device to launch since the brand went into retirement following HP's decision to retire the Palm product line in 2011. Rumors have been circulating every few years that TCL, which acquired the branding rights to the Palm name back in 2015, is planning on releasing new hardware under the Palm brand on modern hardware.
A further dig in the document list reveals some new details and hints about the potential relaunch of the Palm brand and new Palm devices in 2018.
Thursday, September 14 1:32:54 PM PST
by Ryan Kairer
 The Palm brand is set for a comeback in 2018 according to a new report. Palm smartphones and potentially other devices are expected to debut next year from China based multinational electronics firm TCL.
The news comes from an interview with a TCL marketing manager with the Dutch site Android Planet. The TCL rep did not get into specifics but is quoted as stating that Palm products would be announced in early 2018 and hinted that it would include smartphones.
Monday, February 25 11:02:15 AM PST
by Kris Keilhack

Topping a year of
uncertainty and mostly silence from HP, Cnet has
broken the story of LG's pending acquisition of the entire WebOS (former Palm) Global Business Unit, including patents, employees, and source code. Surprisingly, the rejuvenated WebOS will be used not to power any of LG's smartphones (where the company is a firmly entrenched Android supporter) or a new line of tablets but rather its expanding line of Smart TVs.
Rumors have swirled for the better part of the past six months of LG's interest in WebOS. Currently, LG offers a line of Android/Google TV-based Smart LED HDTVs as well as lower-end line of proprietary NetCast SmartTVs with the usual assortment of Netflix and other streaming apps baked into the sets' firmware.
Tuesday, June 5 11:59:16 AM PST
by Ryan Kairer
 The Verge has published
 an excellent insiders look into the "death of Palm and webOS." The well researched article looks back at Palm's efforts to revive the platform and companies fortunes in the last five years of its existence.
The piece, which includes quotes and commentary from a number of former Palm employees and engineers, primarily focuses on the efforts of building and launching webOS and the ensuing struggle to market.
History has proven that tossing out a familiar platform that prints money for your business and starting anew isn't easy: just ask Apple and Microsoft, whose next-generation desktop operating systems in the 1990s (codenamed "Copland" and "Cairo," respectively) floundered aimlessly for years before being replaced with other initiatives. The politics of a mobile platform are no different. The entire process can quickly devolve into a holy war, it turns out, never mind the risk of alienating your users and third-party developers the very people by whom any platform is ultimately made or broken.
Friday, February 3 3:37:10 PM PST
by Kris Keilhack

CRN has posted excerpts of a
new interview with HP CEO Meg Whitman in which she reveals some insight regarding her stance on the future of WebOS.
On slide # 10 of the multi-page spread, Whitman firmly states that HP "(has) to have a tablet offering. We will be back in that business. We're coming back into the market with a Windows 8 tablet, first on an x86 chip and then maybe on an ARM chip. We'll see."
Slide #13 and #14 discuss HP's message to the remaining people on the WebOS team and the rest of high-profile departures, some of which we have recently covered. Whitman says that "This has been a very rocky period for the former Palm team/WebOS team that we built. And this was not a happy set of occurrences over the last six to eight months. So we have lost some people." She surprisingly even states that "Between August and November, there was no plan."